Settings
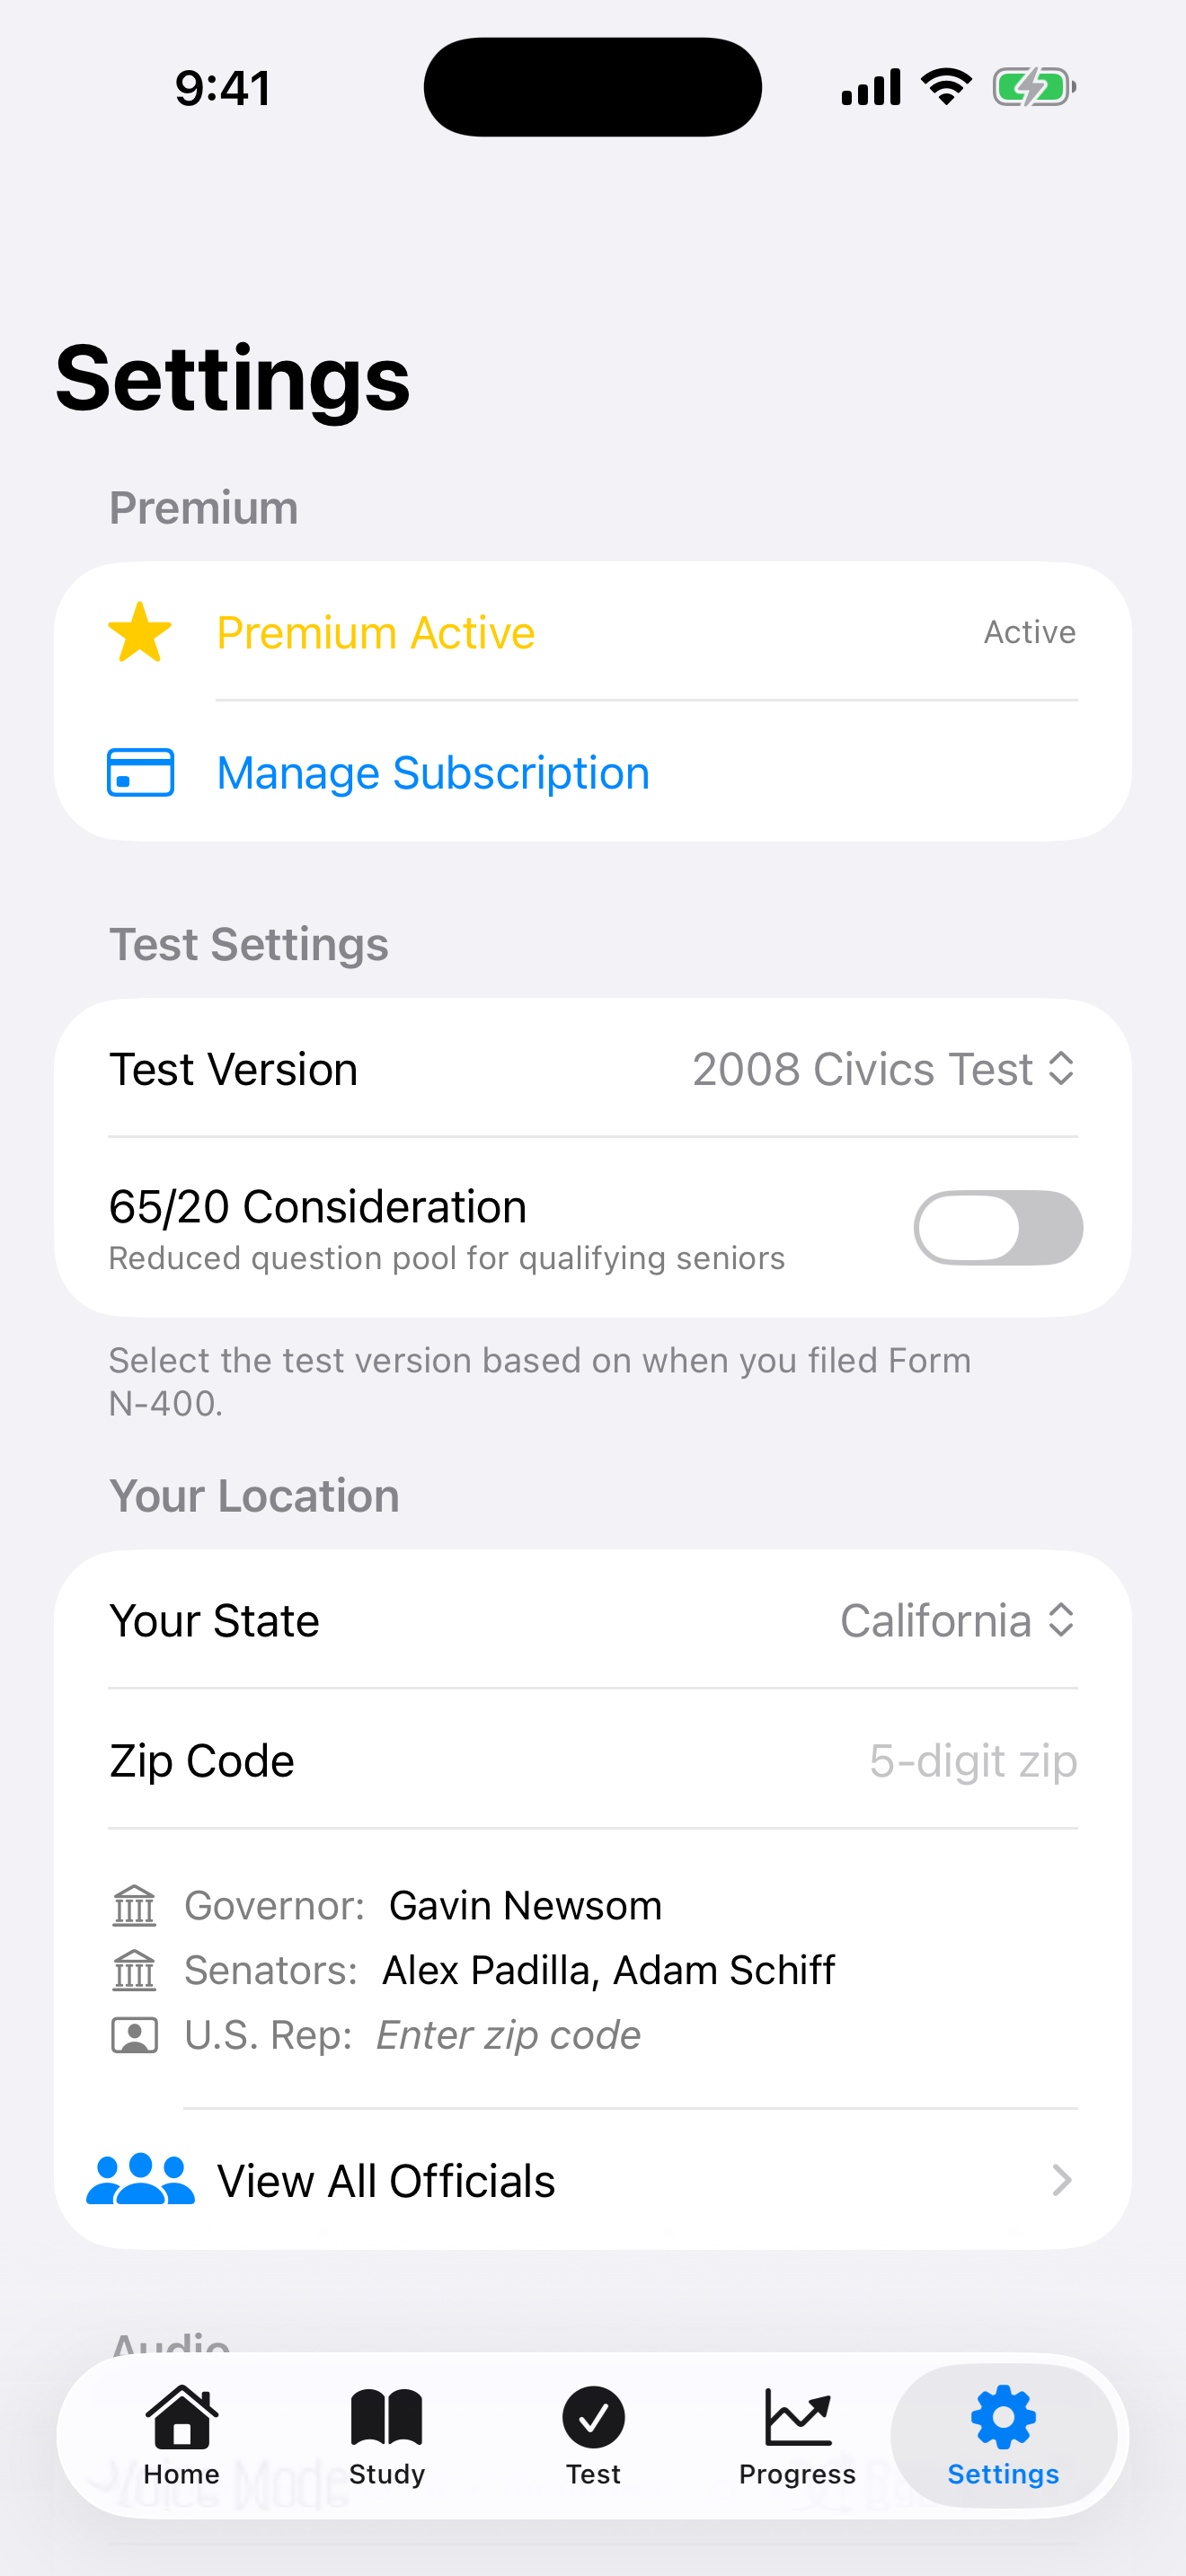
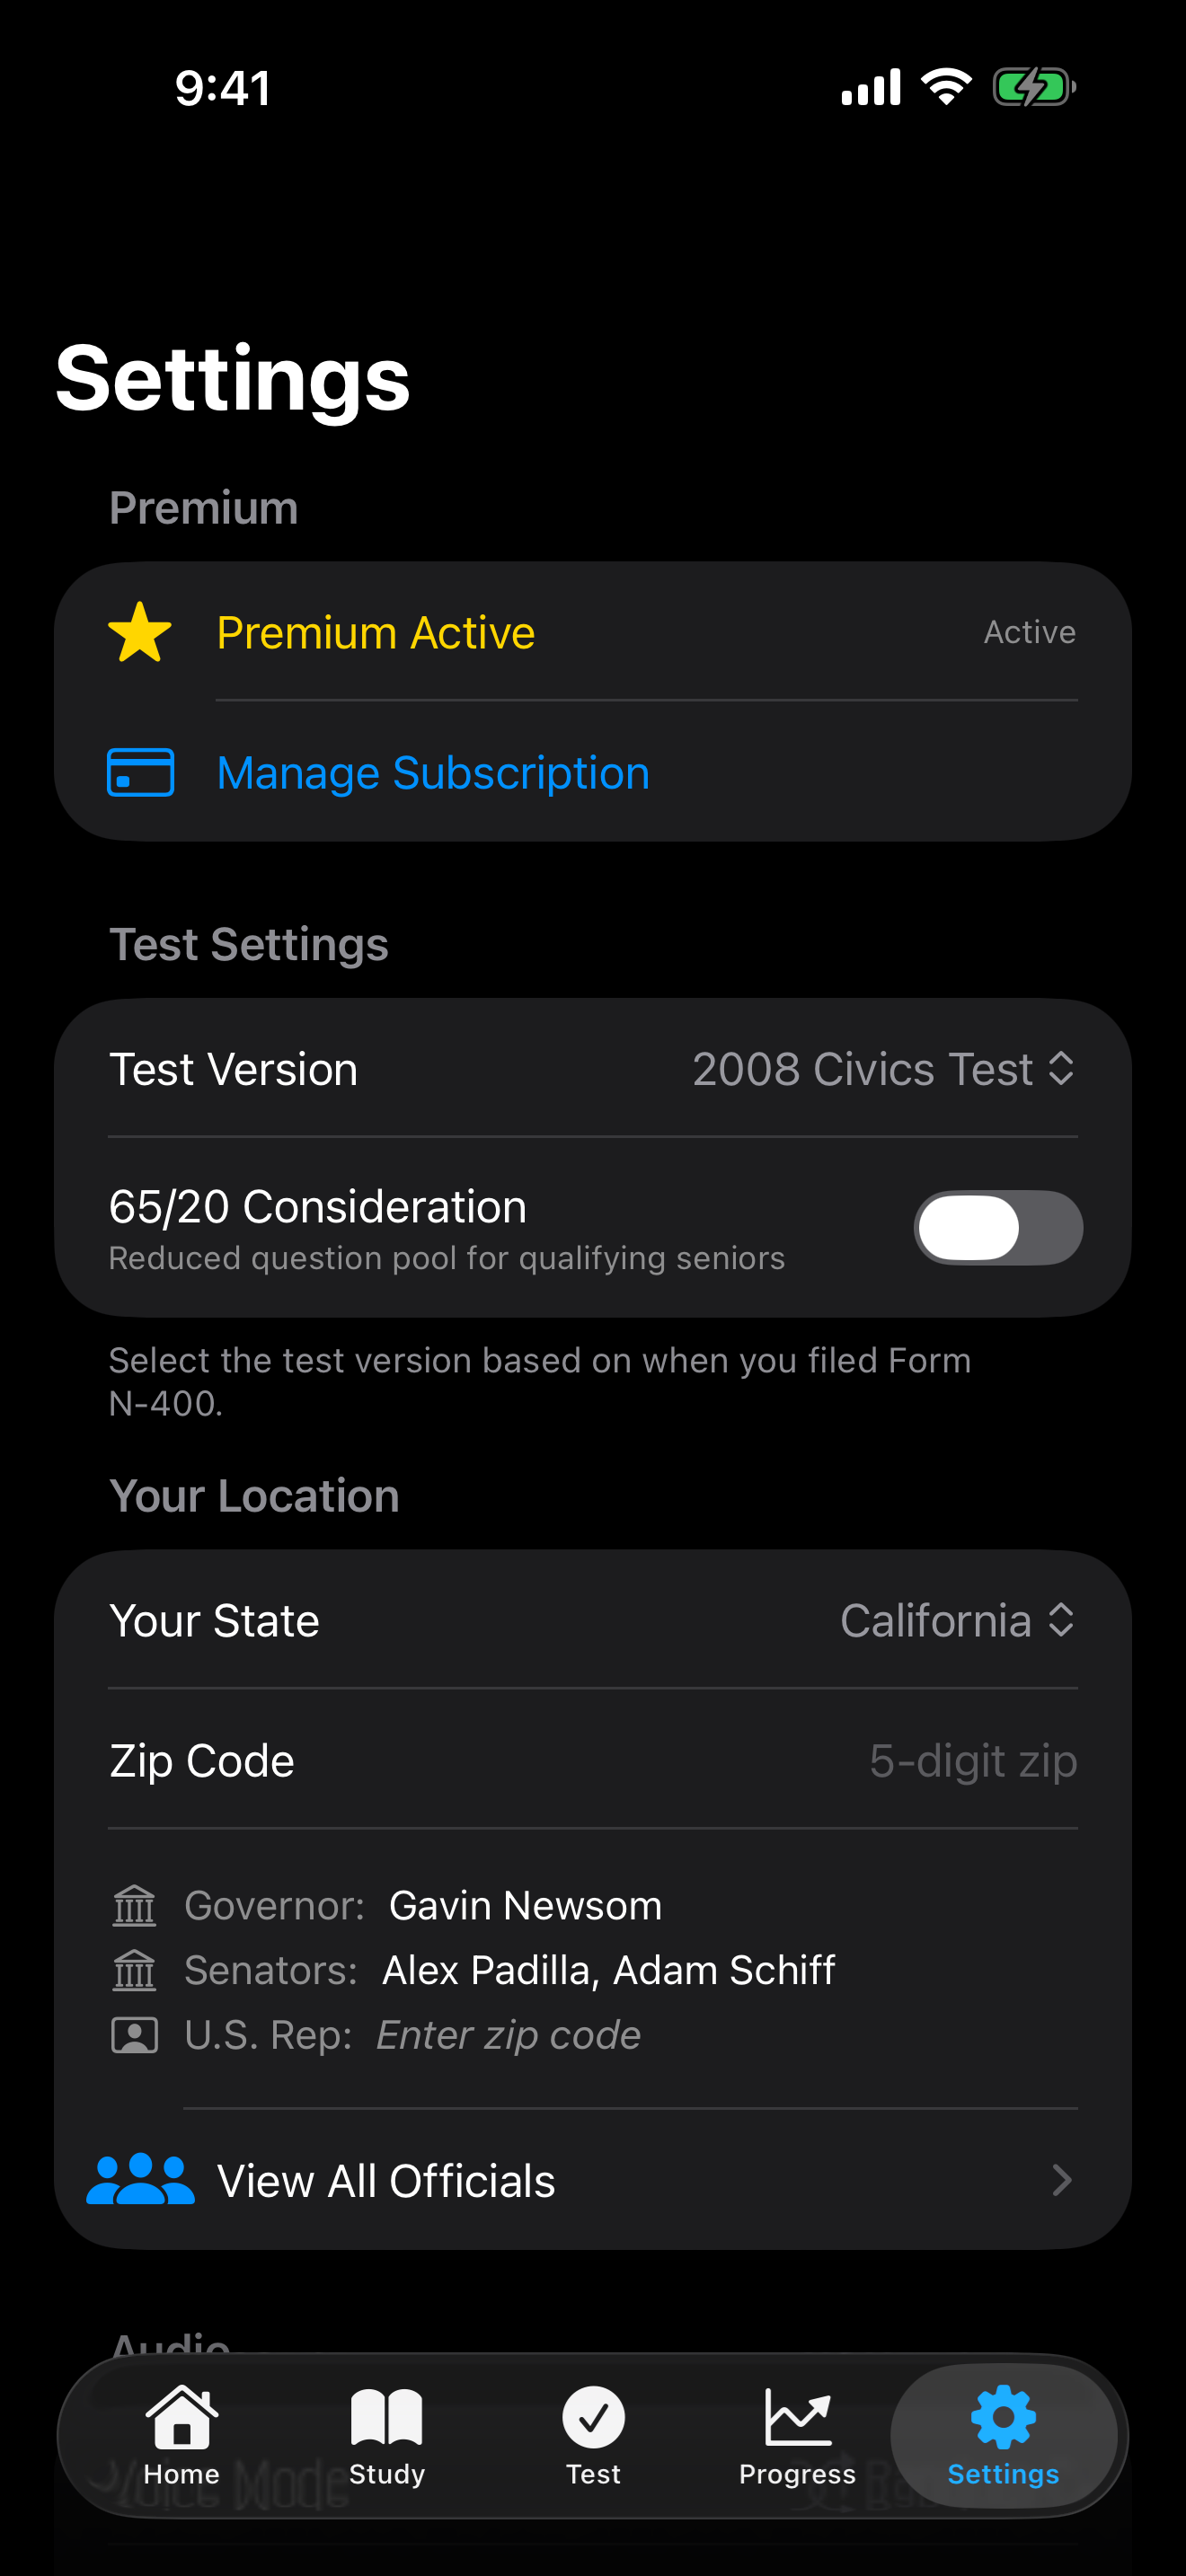
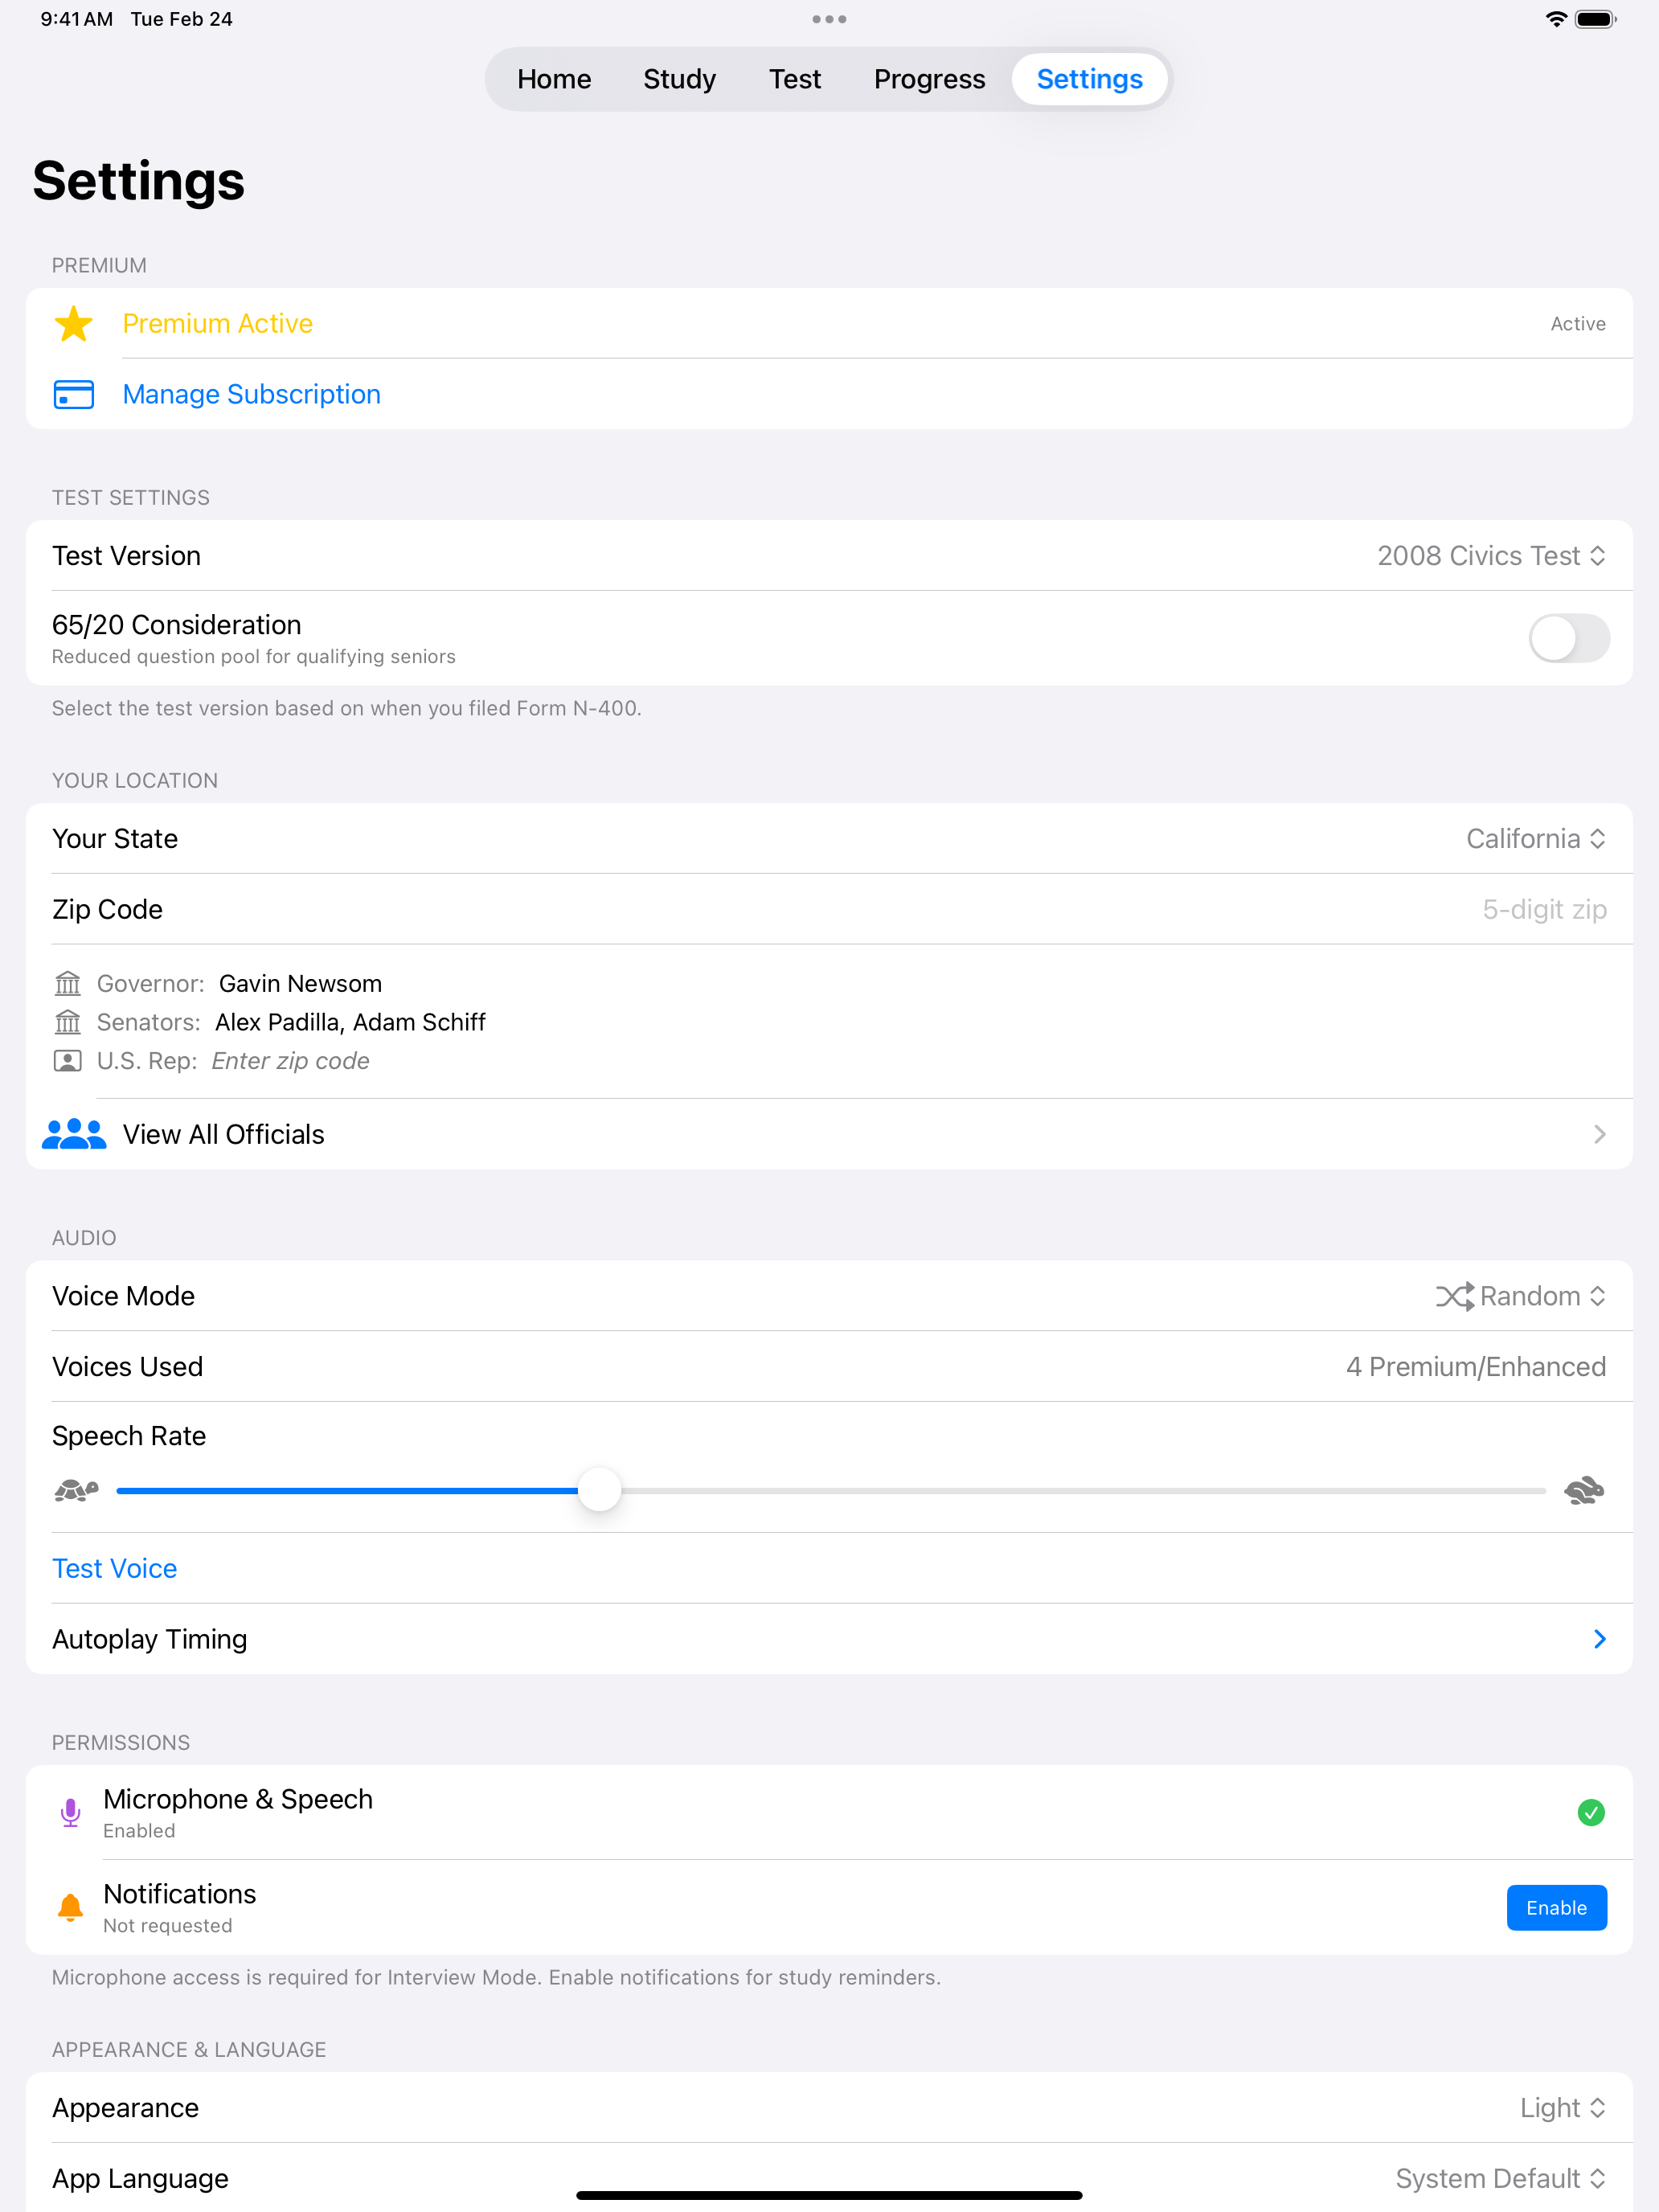
Customize the app to match your needs and test requirements. The Settings screen is your control center for tailoring the study experience to your specific situation.


Test Settings
The first thing to configure is your test version. Which version you need depends on when you filed your Form N-400. Getting this right ensures you study the correct question set.
| Setting | Options | Description |
|---|---|---|
| Test Version | 2025 Civics Test (128 questions), 2008 Civics Test (100 questions) | Choose based on your N-400 filing date. Filed before October 20, 2025 → 2008 Test. Filed on or after → 2025 Test. |
| 65/20 Consideration | On / Off | Turn on if you are 65 or older and have been a permanent resident for 20 or more years on the date you file Form N-400. Limits study and practice tests to the 20 designated questions, with 10 asked and 6 correct needed to pass. |
Check the date on your N-400 receipt notice (Form I-797C) if you are unsure which test version applies to you.


State Selection
Some civics questions have answers that depend on where you live. The Your Location section holds the settings that answer them.
| Setting | Options | Description |
|---|---|---|
| Your State | The 50 states in alphabetical order, then the District of Columbia, then the five U.S. territories | Sets the answers for questions about your governor, U.S. Senators and state capital. |
| Zip Code | 5-digit zip, optional | Used for “Name your U.S. Representative.” The app works out the congressional district that covers the zip and names the member who holds it. Entering a zip sets your state or territory to match it, and picking a state the zip is not in clears it. |
| Your District | The districts that cover your zip code, in a picker | Appears once you enter a zip code the app recognizes. When one district covers your zip, or once you have picked one, it names the district and offers Change District. When your zip code covers more than one district it says so and offers Choose Your District. The picker lists each district with the member who holds it, and until you pick, any of them is accepted. |
The five U.S. territories, Puerto Rico, Guam, the U.S. Virgin Islands, American Samoa and the Northern Mariana Islands, are listed in a U.S. Territories section after the states and D.C. Pick one and the governor and capital questions answer with the territory’s own. The senators question gets the answer USCIS asks for, that the territory has no U.S. senators, and Settings shows that sentence where a state’s senators would be. It does the same for D.C.
Entering a zip code sets your state or territory to match it. Picking a state or territory your zip code is not in clears the zip code, along with your district, and the U.S. Rep row reads Enter zip code, so you can enter the zip code for the new place. A zip code that crosses a state line keeps a state you already chose there, and it stays when you pick either of its states. A zip code the app cannot place, such as an APO or FPO address, leaves your state as it is and stays whichever state you pick. A zip code in Washington, D.C. or a territory names that place’s Delegate to the House, or for Puerto Rico its Resident Commissioner. Neither votes on the House floor.


Your district belongs to the zip code that produced it. Change the zip code and the app works the district out again, keeping your pick only if it still covers the new zip. Zip codes that cross a state line can offer districts from two states.
Update your state and zip code if you move. State officials are updated with each app release. Verify current officials on the USCIS Check for Test Updates page.


Choosing Your District
Choose Your District and Change District both open the same picker. It lists the districts that cover your zip code, each with the member who holds it. The example below is zip code 90210, which California’s 30th, 32nd and 36th districts all cover.
Use My Current Location, at the top, checks where you are against a district map stored on your device. It only helps when you are at home, and nothing is chosen until you tap Use This District. It only offers a district your zip code covers. If you are somewhere your zip code does not reach, it says so and points you to house.gov instead, since you are most likely away from home. Your location is not saved or sent anywhere.
The first time you tap it, iOS asks whether the app may use your location, the same on iPhone and iPad. If you allow only approximate location, the app asks once more for precise location, because it needs it to tell which side of a district line you are on. The app never asks at launch or during setup unless you tap the button. To turn location access off later, use the iOS Settings app, under Privacy & Security > Location Services.


When you are close to a district line, your device cannot tell which side you are on, so the picker marks the districts either side instead of choosing one. When your location is in a district the list leaves out, the picker names it but does not offer it, and points you to house.gov to check your address. The house.gov link opens the official lookup with your zip code already filled in.


Elected Officials
Once your state is set, Settings lists your governor, senators and U.S. Representative under the location rows. Tap View All Officials to open the Elected Officials screen. It shows the officials for your state and zip, each with the civics question it answers, followed by the President, Vice President, Speaker of the House and Chief Justice. When your zip code is split between several districts and you have not picked one yet, the representative card lists those districts and lets you choose. It also links house.gov’s address lookup with your zip code already filled in, because a zip code alone cannot tell two districts apart.


Audio
The Audio section controls how questions and answers are read aloud, including during hands-free autoplay in Study mode.
| Setting | Options | Description |
|---|---|---|
| Voice Mode | Random, Single Voice | Random cycles through up to four U.S. English voices, so you get used to different speakers. Single Voice always uses the voice you pick. |
| Voice | U.S. English voices on your device | Appears in Single Voice mode. When Enhanced or Premium voices are installed, the list shows only those. |
| Speech Rate | Slider, slow to fast | Sets how fast text is read aloud. Tap Test Voice to hear a sample. |
| Autoplay Timing | Collapsed by default | Sets how many times the question and the answer are read (1 to 3 times each) and how long autoplay pauses before the flip, before the answer and before the next card. |
Enhanced and Premium voices sound more natural than the default ones. They are free from Apple. Download them in your device’s Settings → Accessibility → Spoken Content → Voices, and the app uses them automatically.
Notifications and Permissions
The Permissions section shows whether the app can use the microphone and send notifications. Location is not listed there, because the app asks for it only from the district picker. See Choosing Your District. Tap Enable on a row to allow it. If you turned a permission down earlier, the row shows Settings instead, which opens iOS Settings so you can allow it there.
| Setting | Options | Description |
|---|---|---|
| Microphone & Speech | Enable, or Settings if denied | Speech practice such as Interview Mode needs this permission. |
| Notifications | Enable, or Settings if denied | Allows study reminders and alerts. The rows below appear only after notifications are allowed. |
| Daily Reminder | On / Off | Sends one study reminder a day. Turn it on to choose a Reminder Time. The default is 7:00 PM. |
| Streak Milestones Pro | On / Off | Notifies you when your study streak reaches a milestone. |
| Achievement Alerts | On / Off | Notifies you when you earn an achievement. |
Language
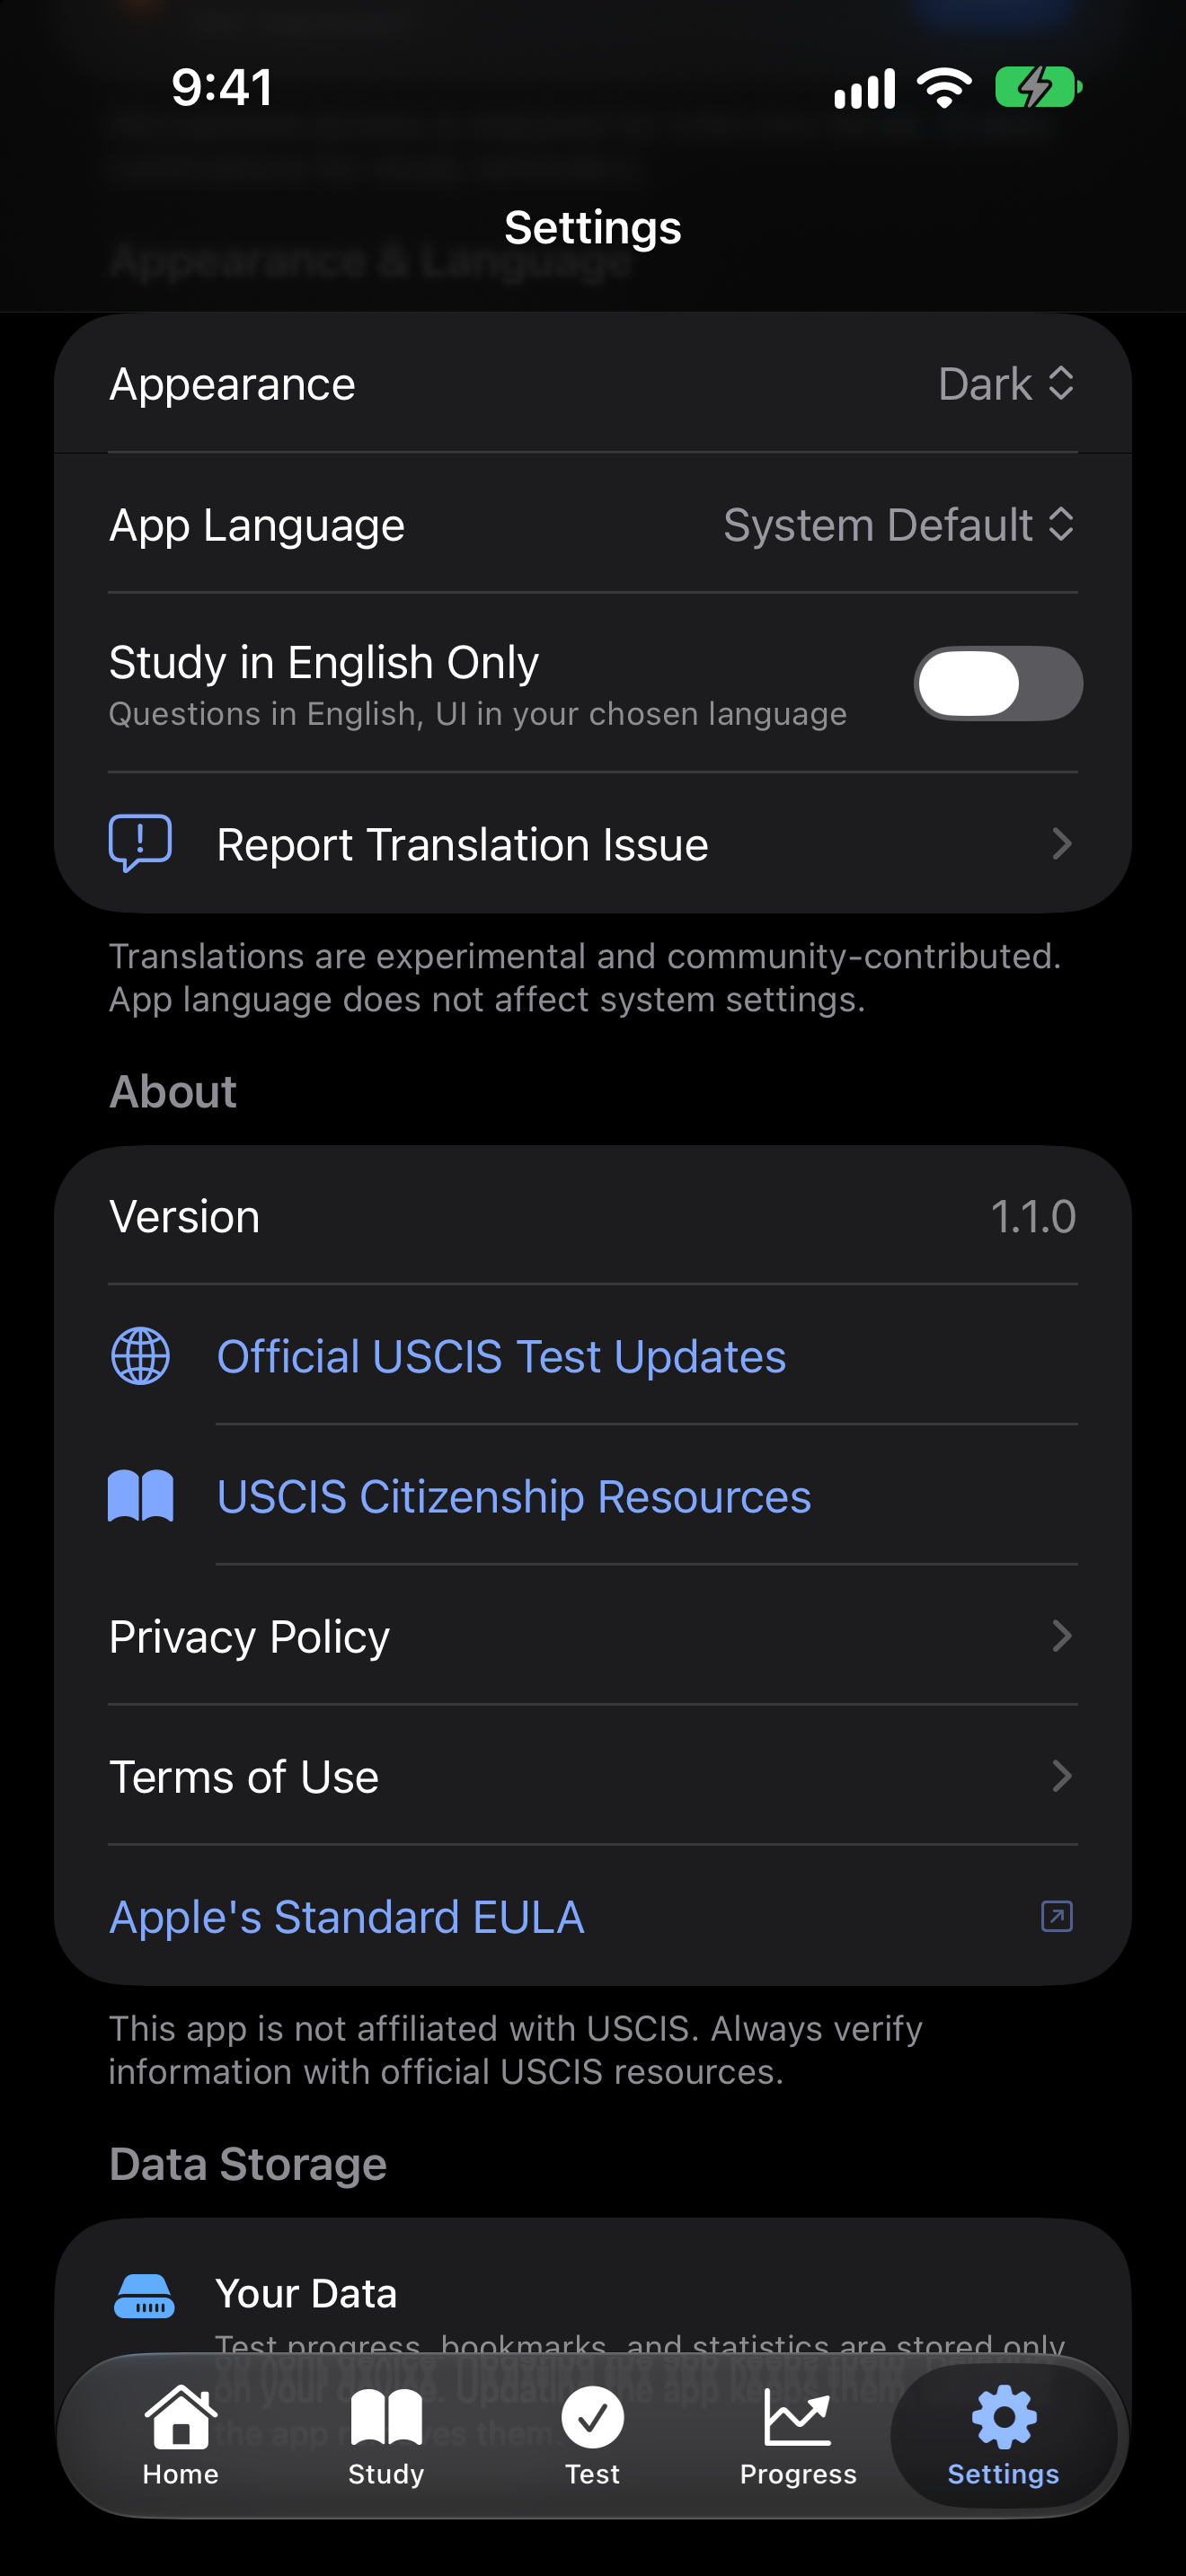
Language settings are in the Appearance & Language section. The app interface is available in 13 languages, English included, so you can study civics content in the language you are most comfortable with while building English skills through the reading and writing tests.
| Setting | Options | Description |
|---|---|---|
| App Language | System Default, English, Spanish, Portuguese, French, Chinese (Simplified), Chinese (Traditional), Korean, Vietnamese, Arabic, Hindi, Turkish, Russian, Tagalog | Changes the app interface and civics study materials, Multiple Choice options included. System Default follows your device language. |
| Study in English Only | On / Off | Keeps questions and answers in English while the rest of the app stays in your chosen language. The globe button on study and test screens switches this too. It appears only when the app is in a language other than English, and not during an interview, which shows no question text. |
Translations are community-contributed and marked experimental in the app. If something looks wrong, check it against the English and tap Report Translation Issue in the same section to email a correction.
Reading and writing tests remain in English regardless of your language setting, since the USCIS test requires demonstrating English proficiency.


Appearance
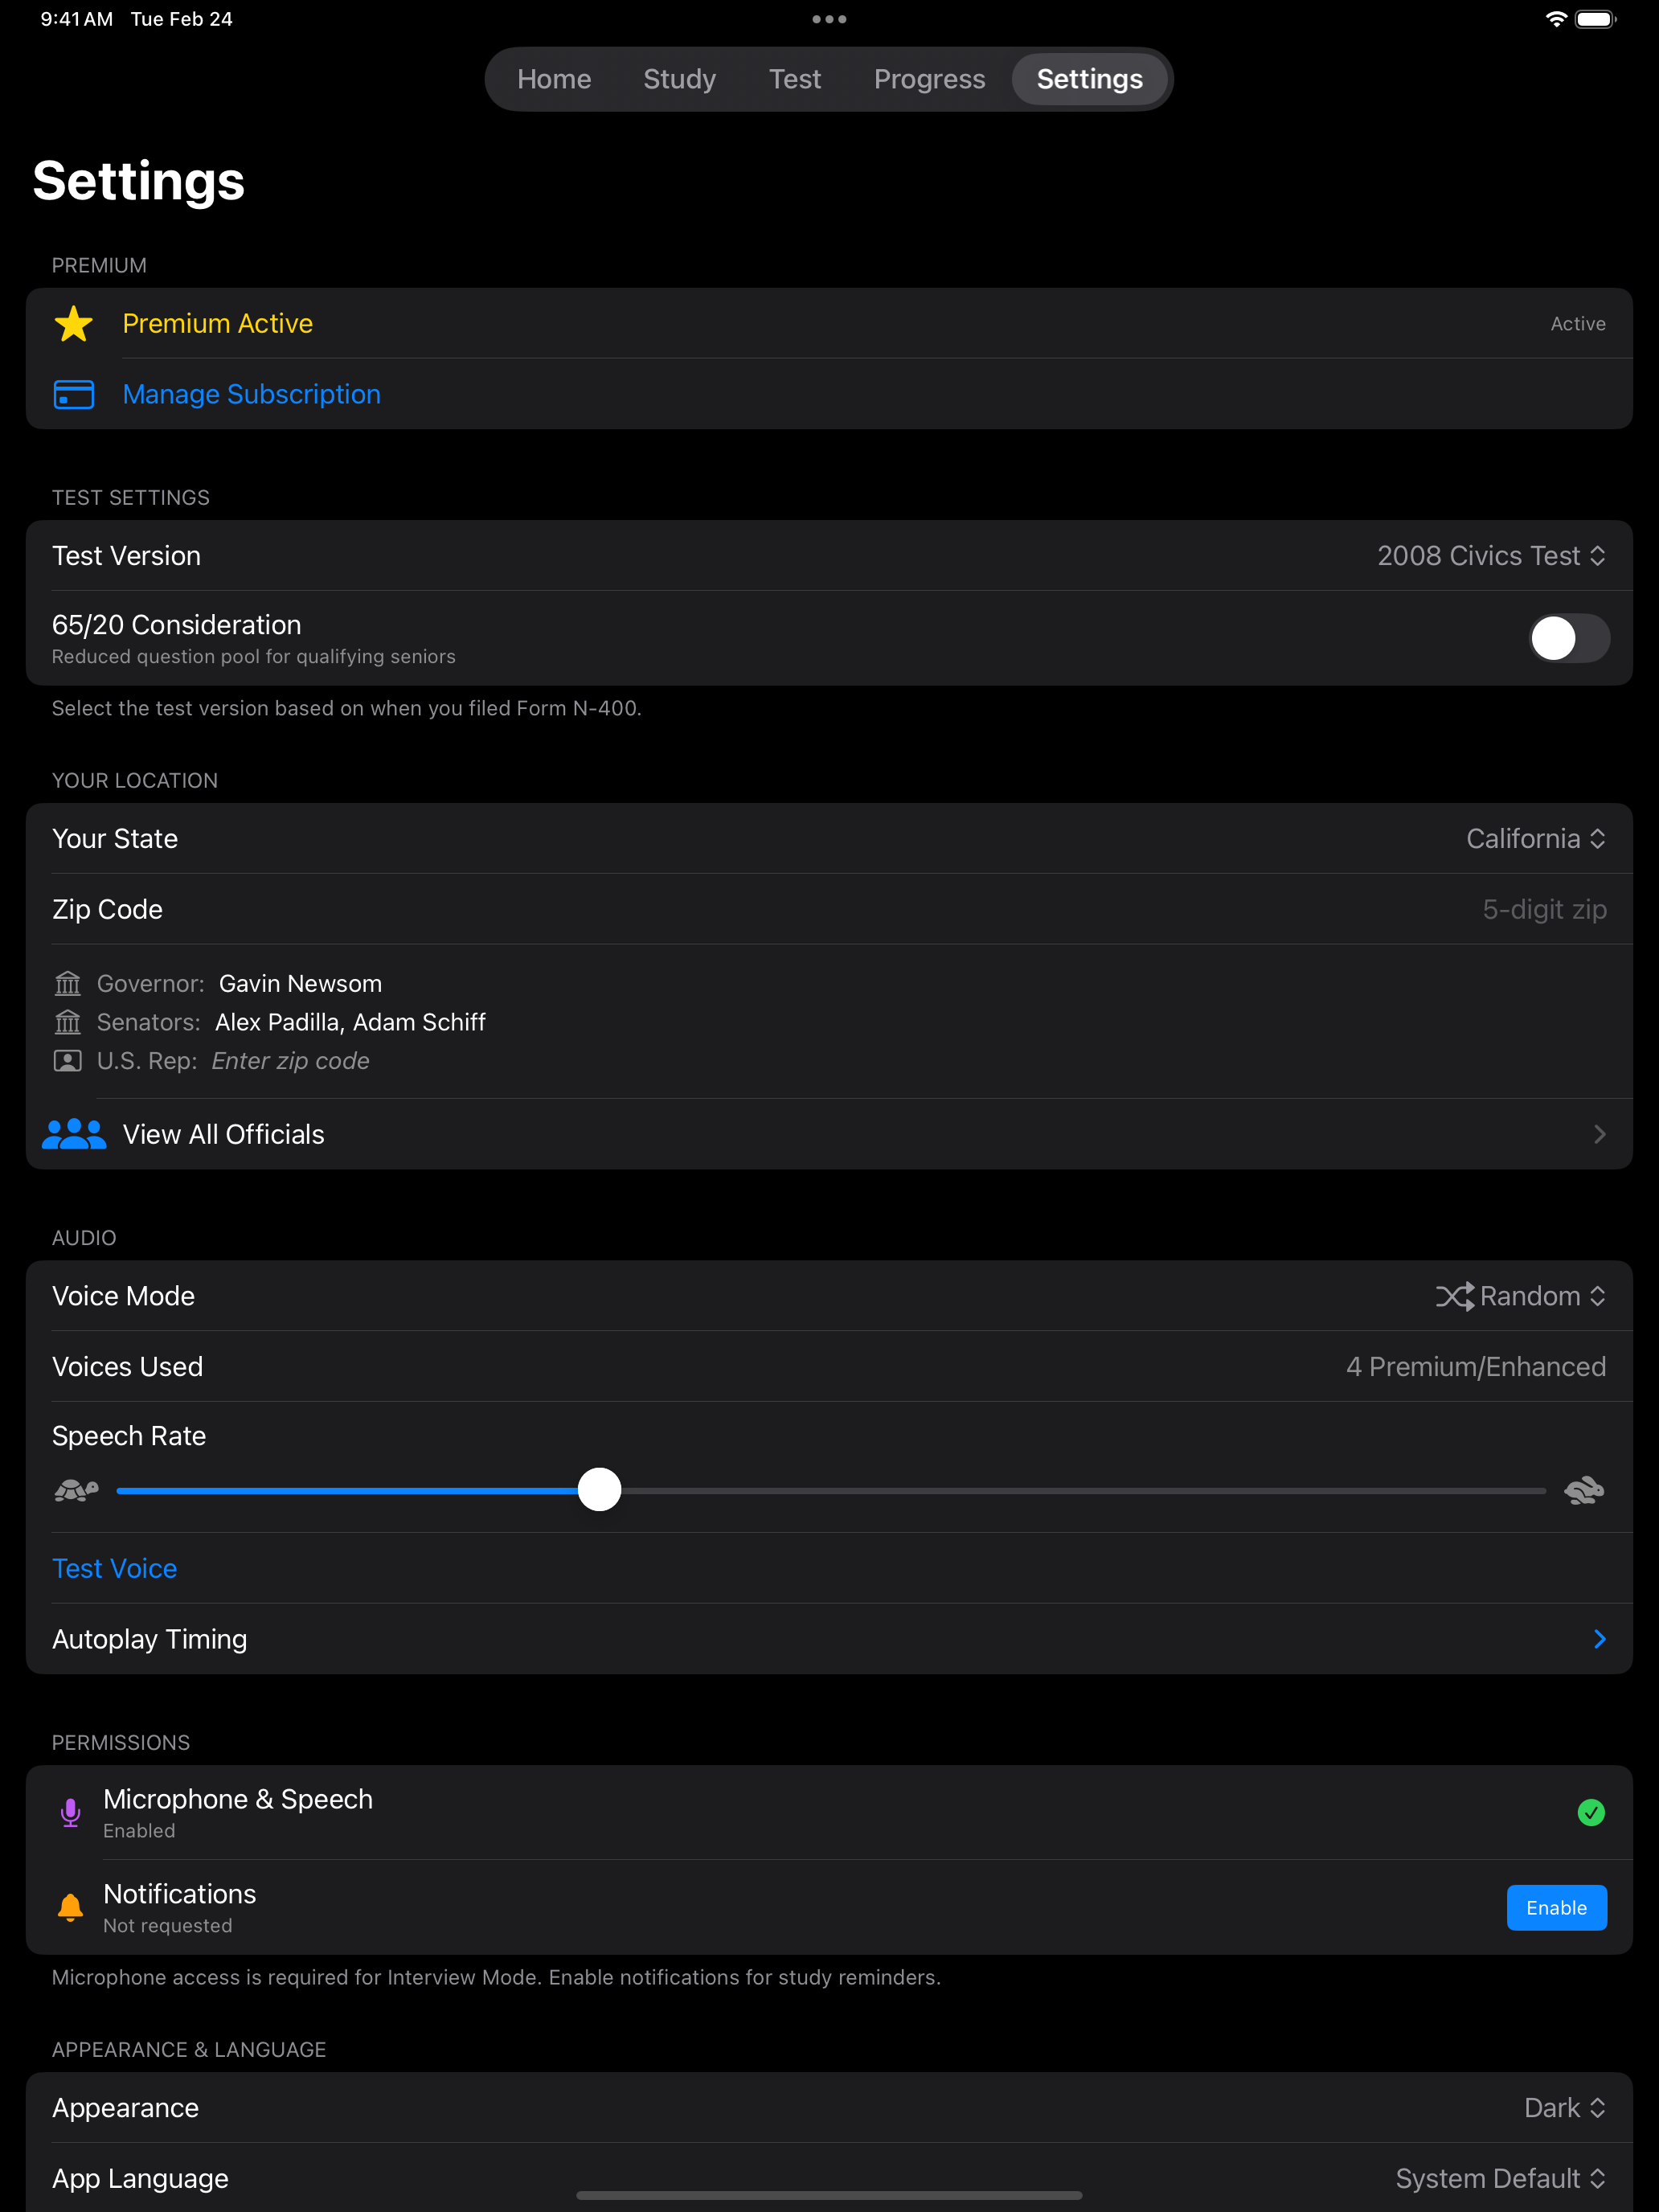
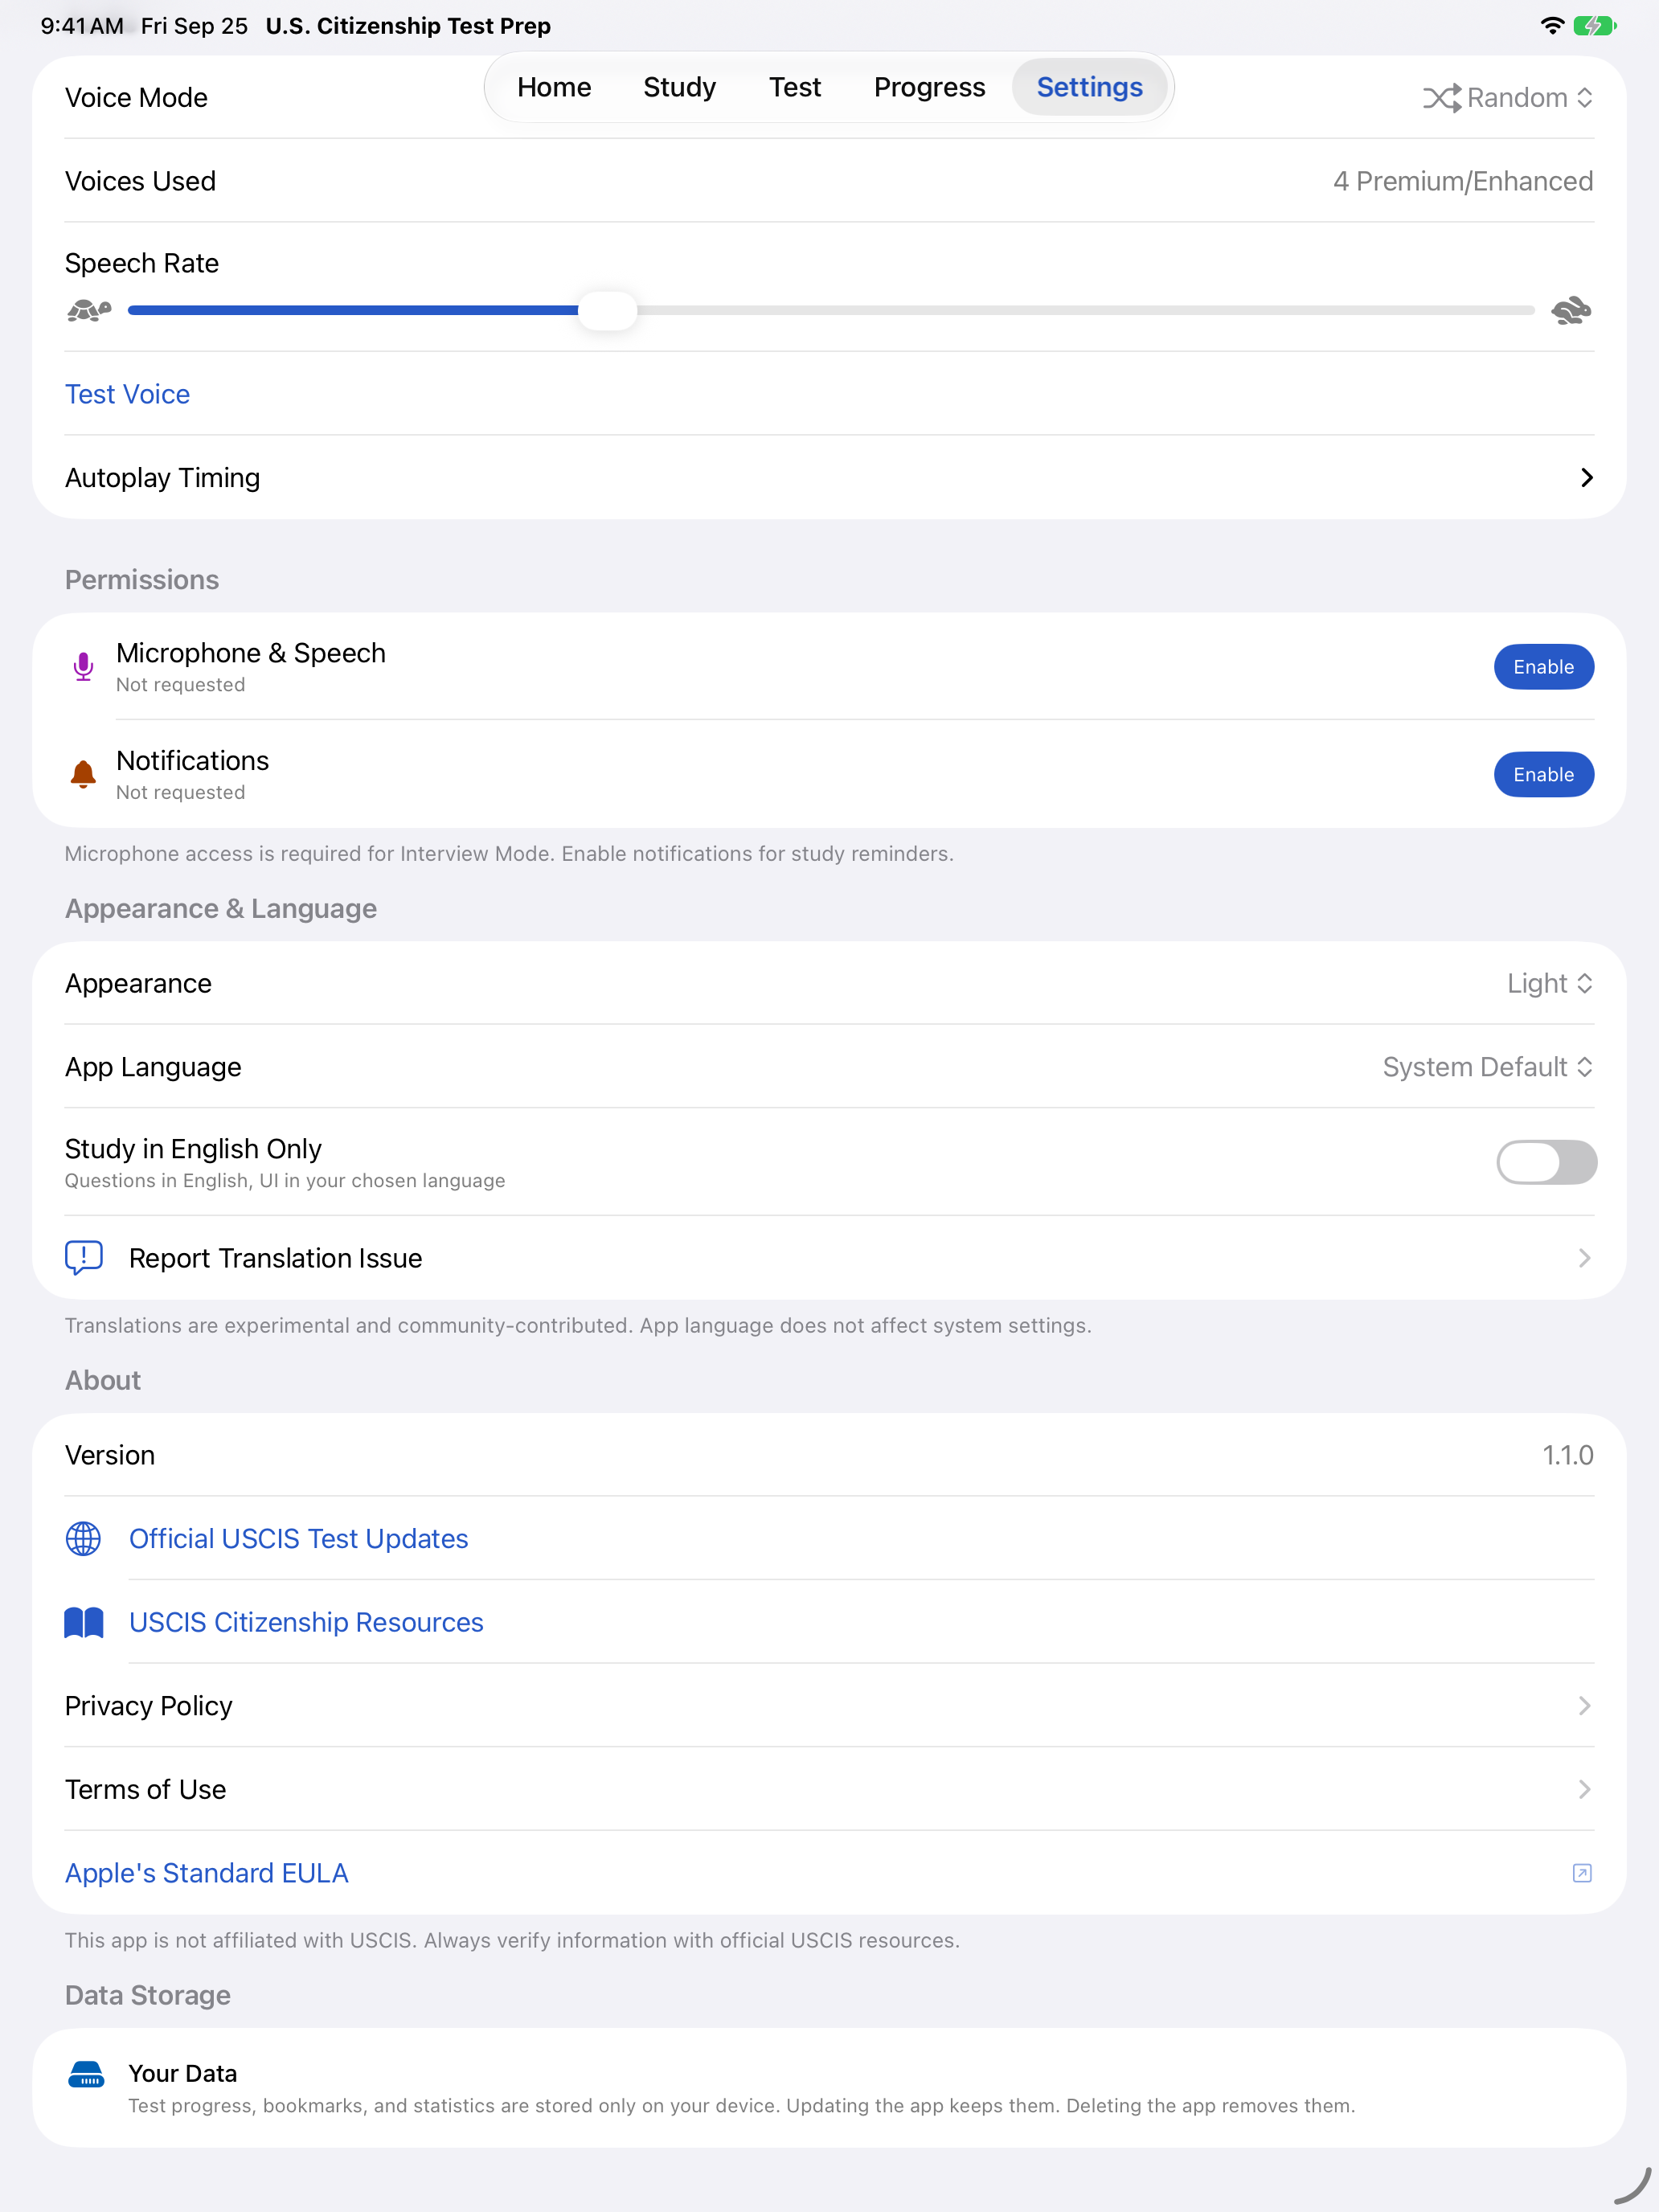
Choose the visual theme that suits your study sessions. The Appearance picker sits directly above the App Language picker in the same card, shown in the screenshot above.
Both themes are designed for readability, so color still carries meaning in the dark. Text, scores and links use deeper shades in light mode and brighter ones in dark mode, filled buttons keep a deep shade in both so their labels stay easy to read, and the handwriting paper turns dark along with the rest of the app. Here is the home screen in each.


| Setting | Options | Description |
|---|---|---|
| Appearance | System, Light, Dark | System follows your device setting. Choose Light or Dark to override it. |
Add-ons
Purchases live in the Add-ons section at the top of Settings. All core study features are free, so this section is entirely optional. See the Add-ons page for the full comparison.
| Purchase | Type | What you get |
|---|---|---|
| Pro (2026-2027) Pro | One-time, $4.99 | Ad-free experience, detailed analytics and score breakdowns, study streak tracking, the study activity grid, one free streak repair a month, extended test history, missed-question review, the answer on the Question of the Day widget |
| Remove Ads | One-time, $1.99 | Removes advertisements and nothing else |
| 10 Streak Repairs | Consumable, $0.99 | Ten streak repairs, each bridging one missed day. Bought at any time from the Get 10 Streak Repairs row, and used from the Progress tab when your streak has a gap. Used up when spent, and not restorable |
What the section shows
Before you buy anything, Add-ons shows three rows. Get Pro opens the Pro page, Remove Ads shows its price, and Get 10 Streak Repairs shows the price of a pack. If you buy Remove Ads on its own, the first two rows shrink to a single Ads Removed row marked Upgrade, which opens the Pro page. Once you own Pro, they become a status readout. Pro shows as active, and Remove Ads is greyed out and marked Included with Pro, so it is clear you do not need to buy it separately.
Get 10 Streak Repairs stays at the bottom of the section for everyone, with or without Pro or Remove Ads, on iPhone and iPad. Below the title it shows your balance: the repairs you have bought and not spent, and with Pro, whether this month’s free repair is still there. Tap it to buy a pack of ten. Buying here only adds to your balance. The Progress tab offers a repair when your streak misses a day or two, and repairs you do not use carry over to later misses, as the note under the section says. If the purchase has to be approved first, for example with Ask to Buy, the row says so, and the repairs arrive once it is approved.
Before buying. Get Pro opens the Pro page, Remove Ads shows its price, and Get 10 Streak Repairs shows the price of a pack and your balance.

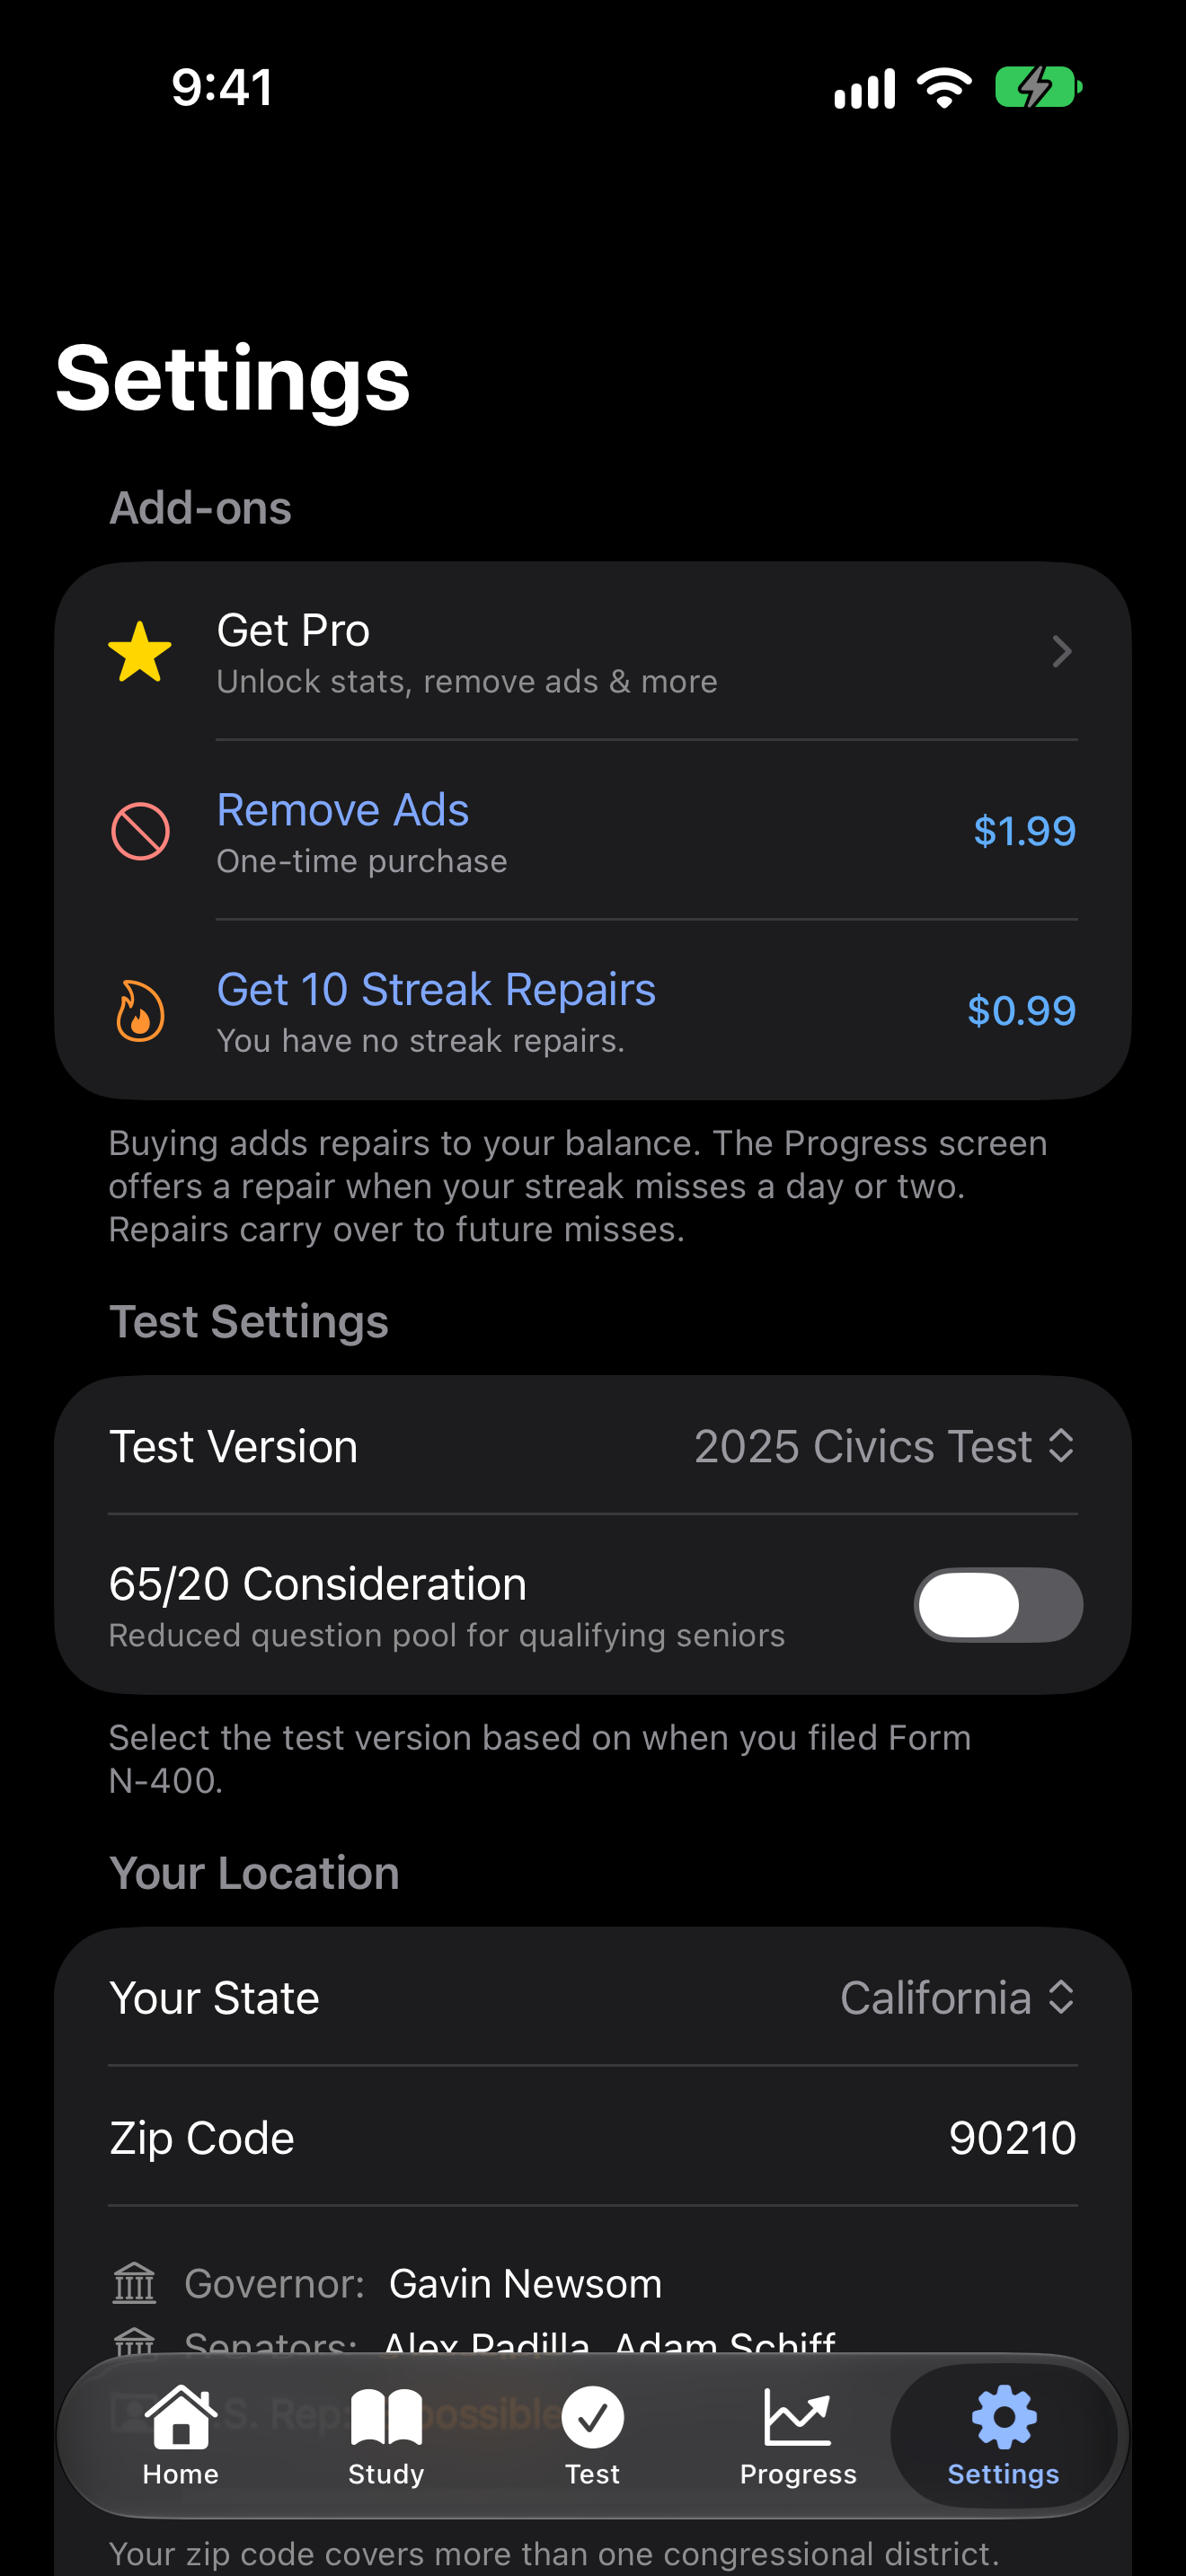
With Pro. Remove Ads is greyed out and marked as included, and the Streak Repairs row shows whether this month’s free repair is still there.


Before buying. Get Pro opens the Pro page, Remove Ads shows its price, and Get 10 Streak Repairs shows the price of a pack and your balance.

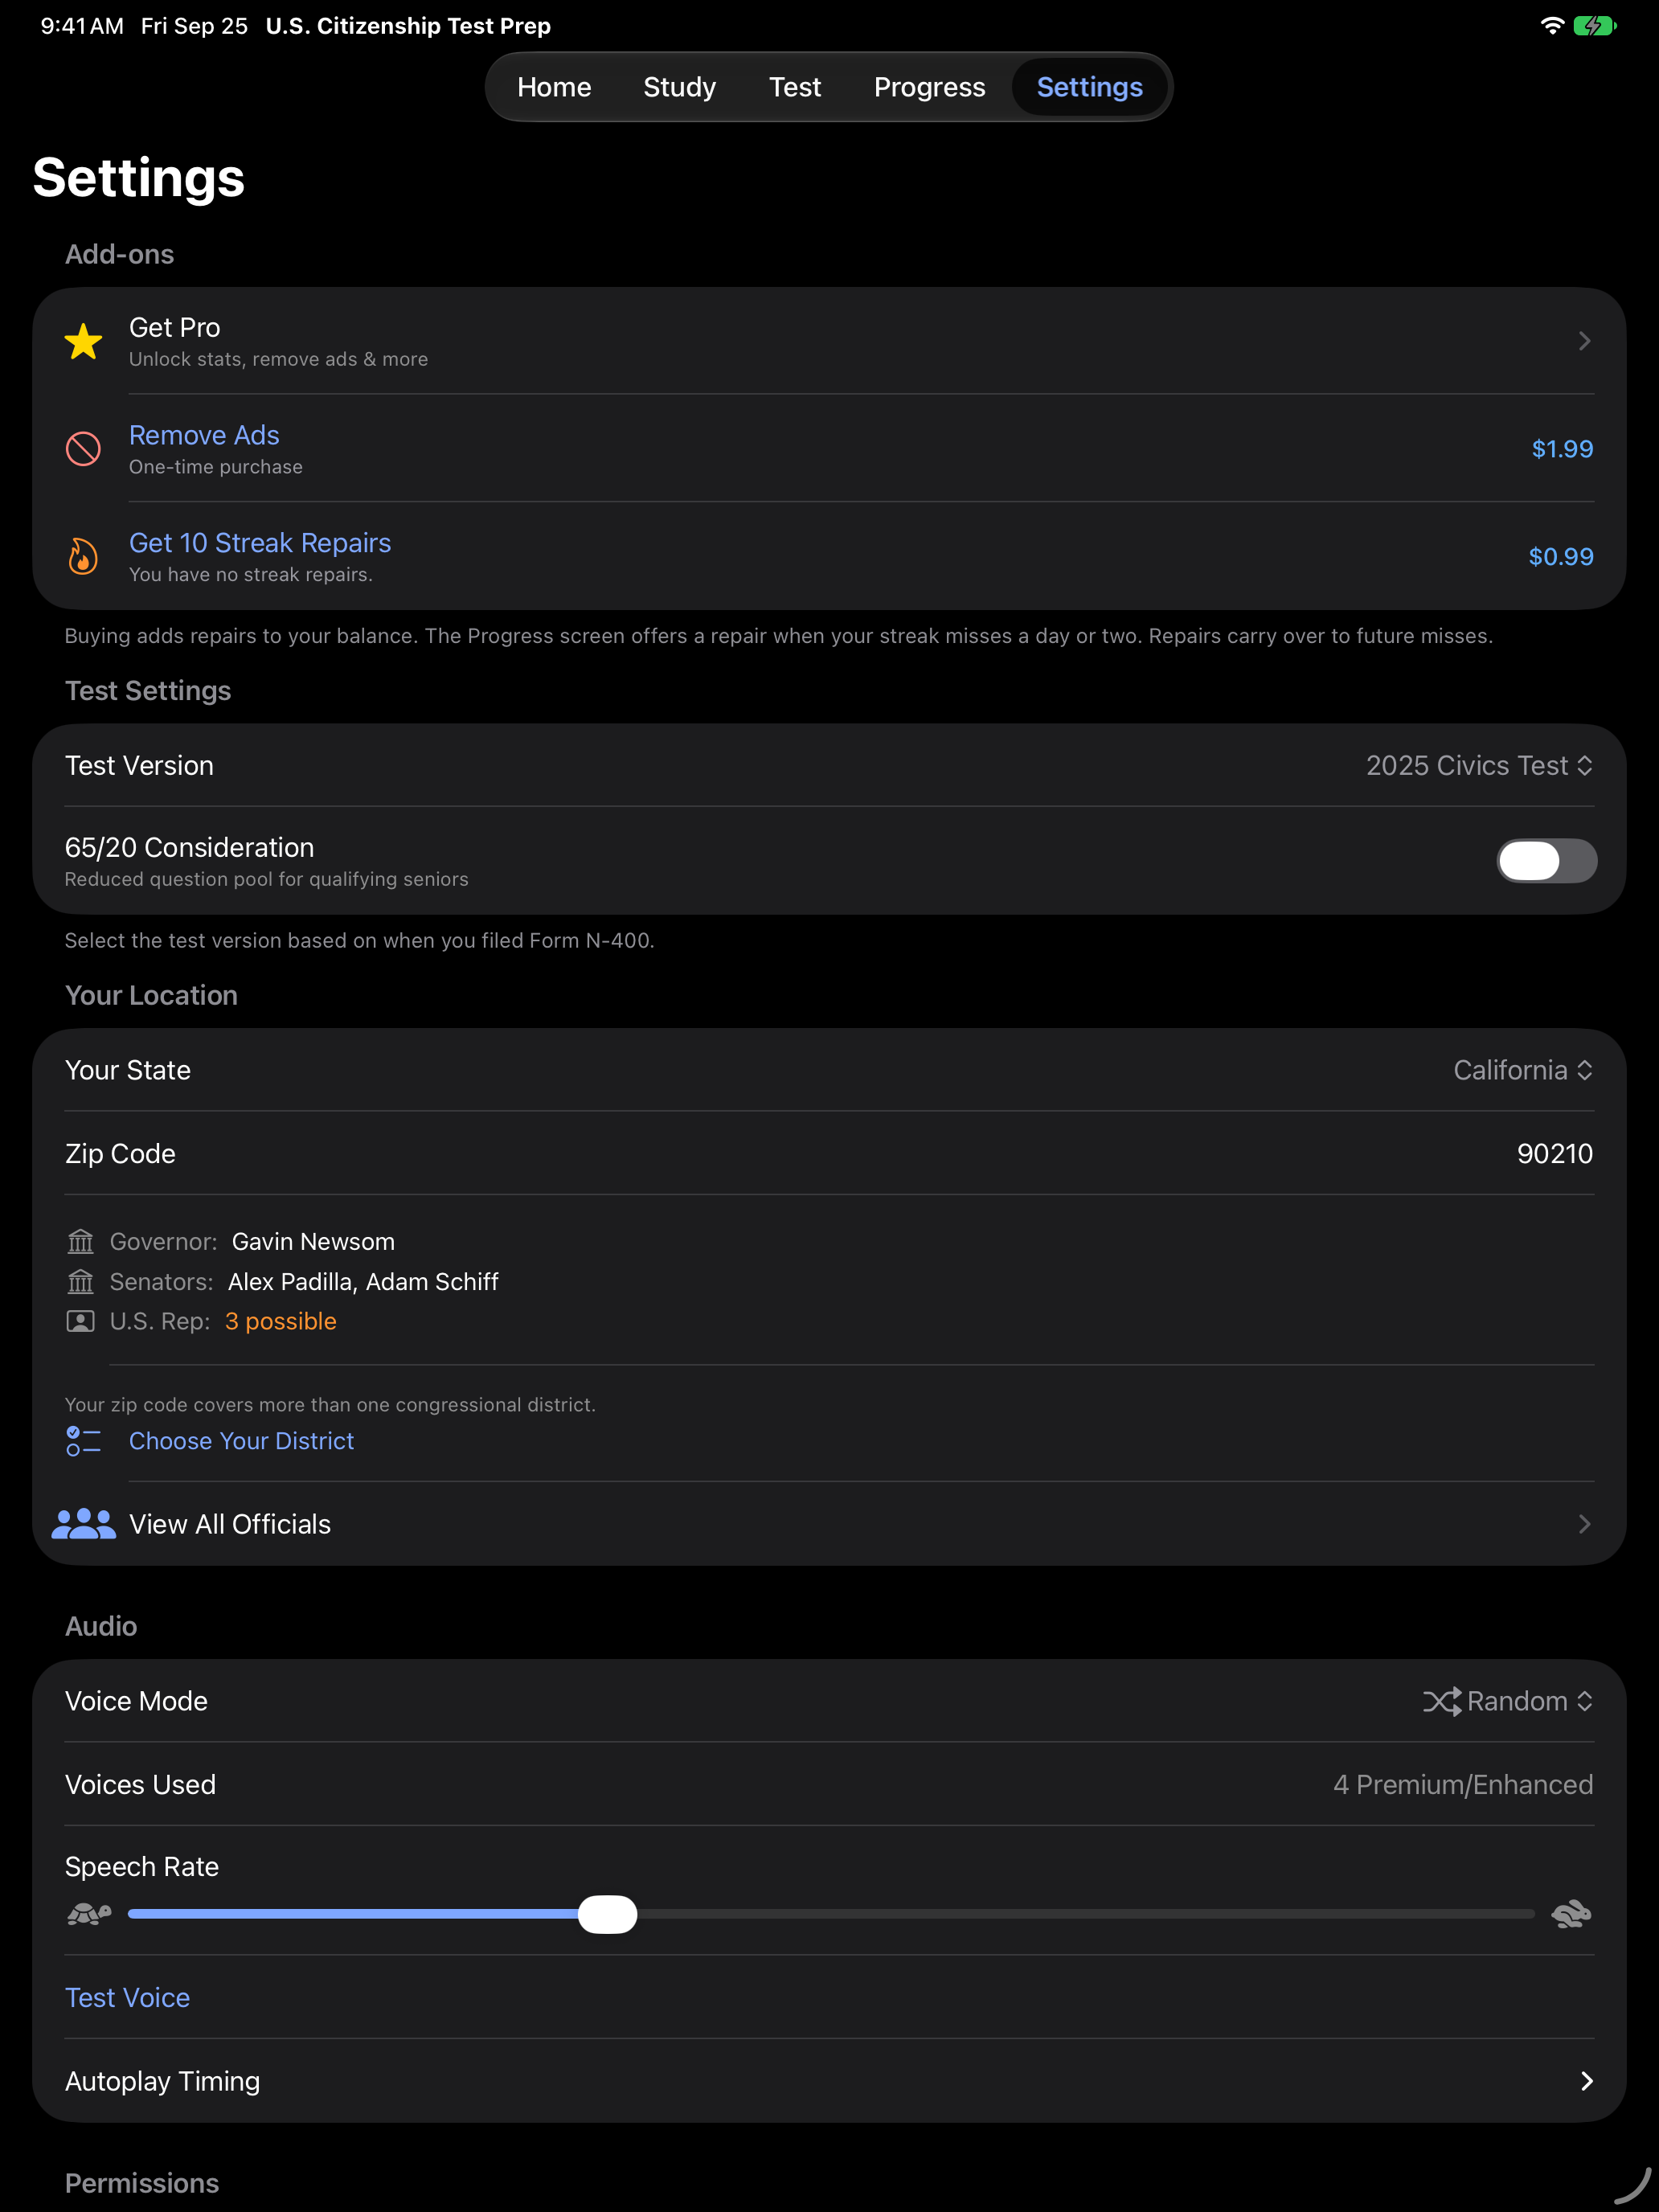
With Pro. Remove Ads is greyed out and marked as included, and the Streak Repairs row shows whether this month’s free repair is still there.


If you have reinstalled the app or switched devices and a purchase is not showing, tap Get Pro in Add-ons, or Ads Removed if you bought Remove Ads. Then tap Restore Purchases below the purchase buttons on the Pro page. Restoring does not charge you again. Purchases belong to your Apple Account rather than the device, so they restore on any device signed in to the same account.
About
The About section near the bottom of Settings shows the app version. It links to the official USCIS test updates page and USCIS citizenship resources, and it opens the Privacy Policy, the Terms of Use and Apple’s standard EULA. Below it, Data Storage is a reminder that your test progress, bookmarks and statistics are stored only on your device, so deleting the app removes them.